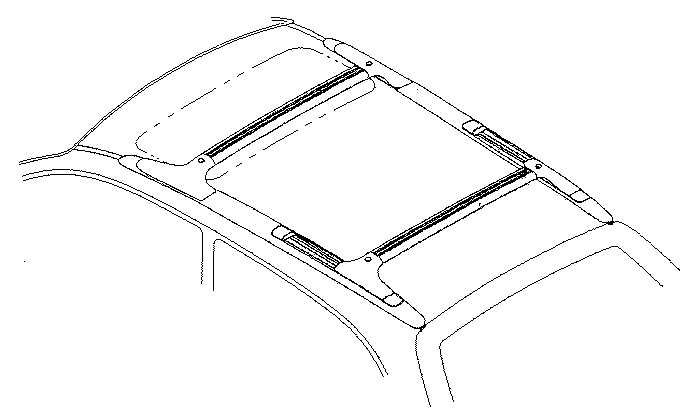
2002- 2003.5 Protege5 (factory equipped with roof rails and cross bars)

If a vehicle was factory equipped with the roof rack side rails, the cross bars can be removed or installed. Please follow the instructions below for removal and installation of the cross bars.
NOTE: The roof rack must be equipped from the factory. The roof rack cannot be installed as an accessory. Mid year 2003 the roof rack cross bars will no longer be installed on the vehicle at the port, they will be shipped in the trunk of the vehicle, to be installed at the "customers discretion".
CAUTION:
NOTE: The cross bars can only be installed in a vehicle that came from the factory with the side rails installed.
|
#) |
Description |
Qty |
#) |
Description |
Qty |
|
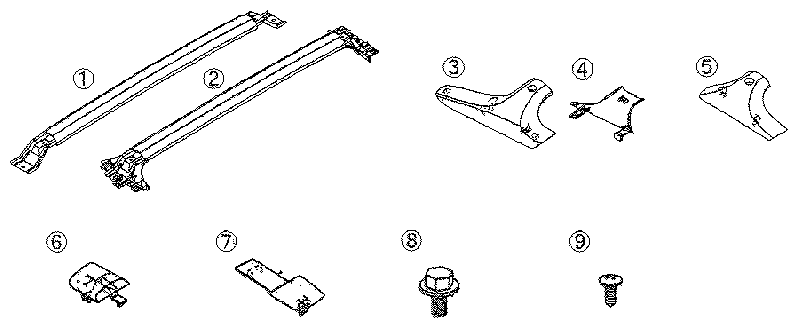
(1) |
Front Cross Bar |
1 |
(6) |
Rear Rail Forward Cover |
1/side |
|
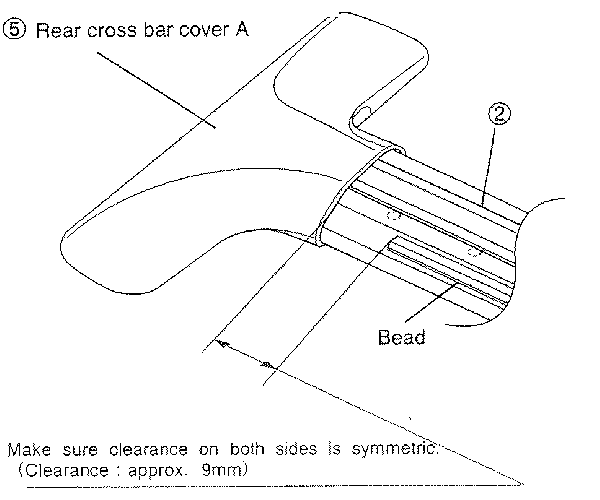
(2) |
Rear Cross Bar |
1 |
(7) |
Rear Rail Back Cover |
1/side |
|
(3) |
Front Cross Bar Upper Cover |
1/side |
(8) |
Bolt (M8, L16) pre-coated with blue threadlock |
2 |
|
(4) |
Front Cross Bar Lower Cove |
1/side |
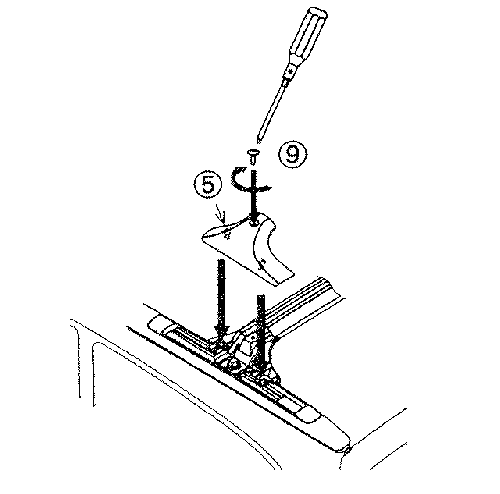
(9) |
Finisher Screw (M4) |
4 |
|
(5) |
Rear Cross Bar Upper Cover |
1/side |
|
Description |
|
Flat Blade Screwdriver |
|
Phillips Screwdriver #)2 |
|
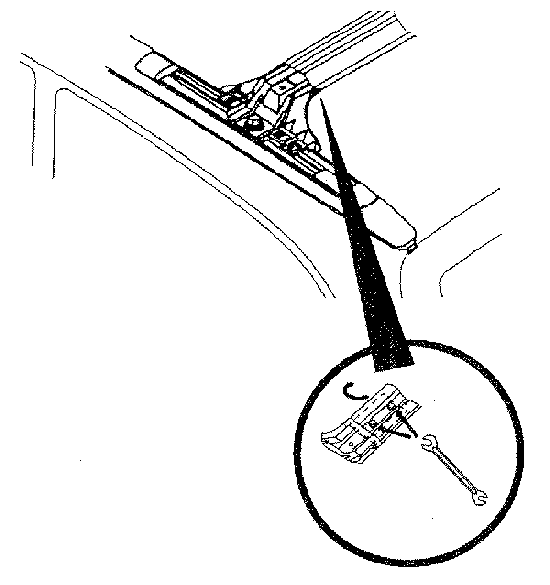
12mm Combination Wrench |
|
12mm Socket |
|
Torque Wrench (inlb) |
CAUTION: Use care not to scratch the vehicle, wear work gloves to avoid hand injury.
NOTE: Keep the finisher panels, they will be required if the cross bars are ever removed.
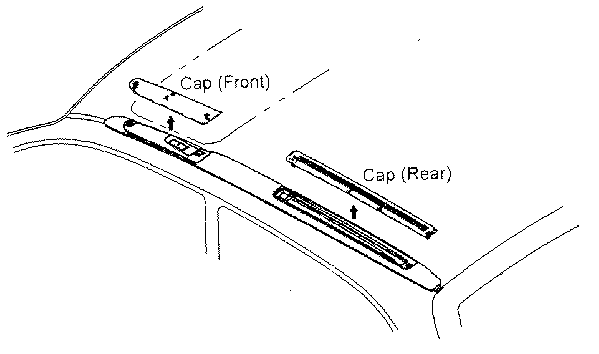
WARNING: This step requires two people. Take care not to scratch the vehicle.
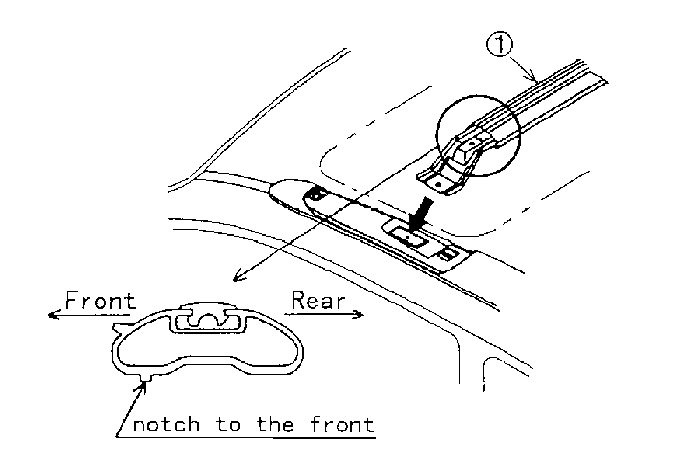
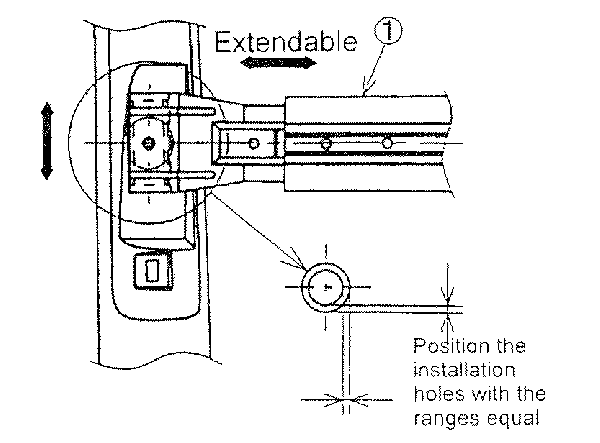
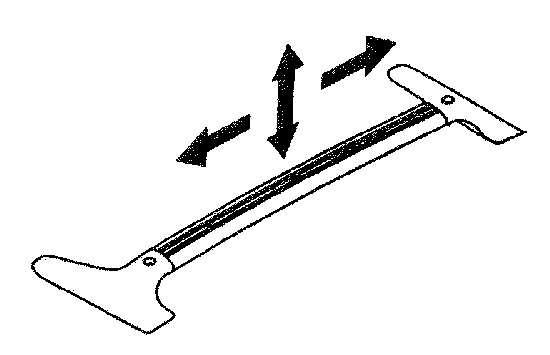
NOTE: If one bolt is tightened and then the other, the cross bar will lean to one side distorting the rails and making the rack crooked, tighten the bolts evenly to prevent distortion.
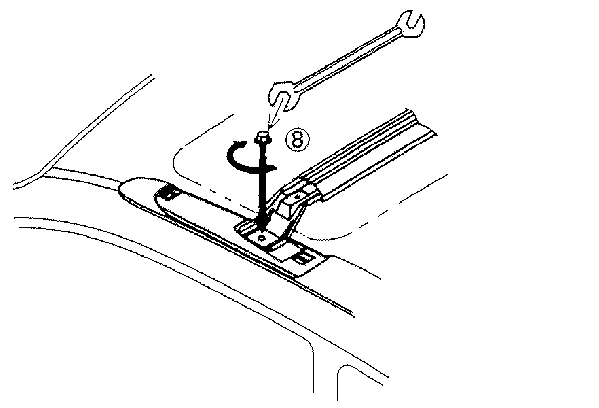
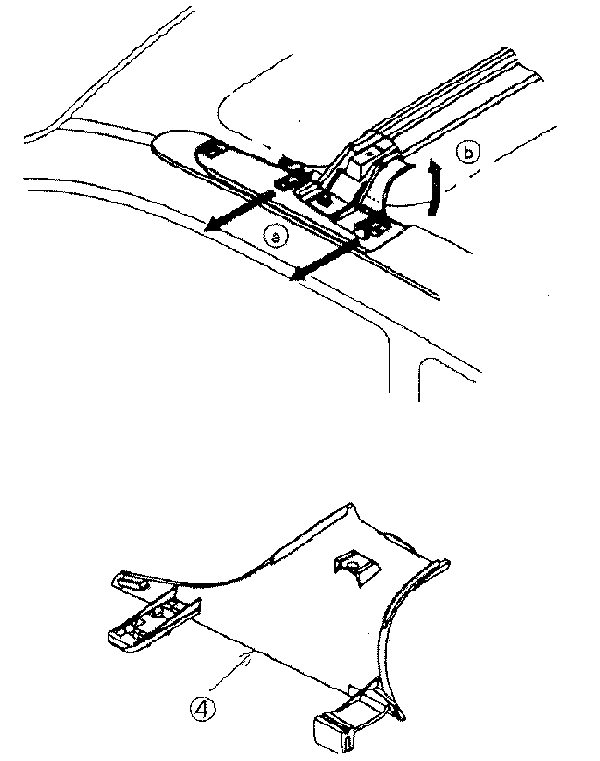
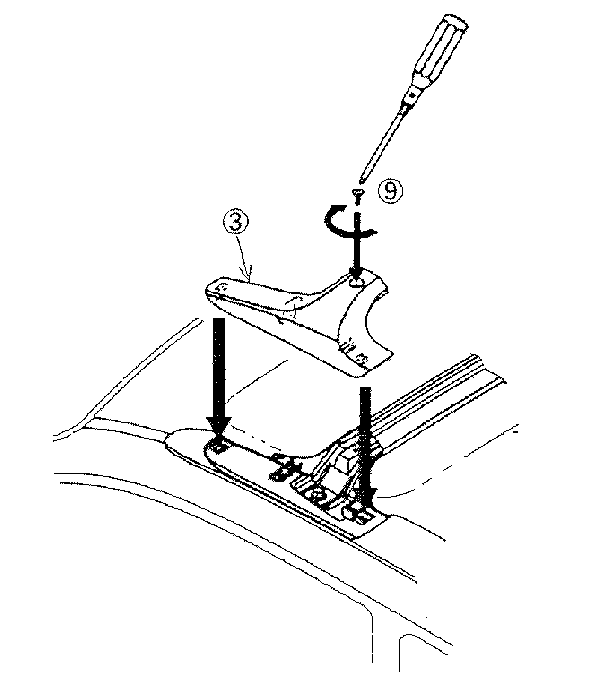
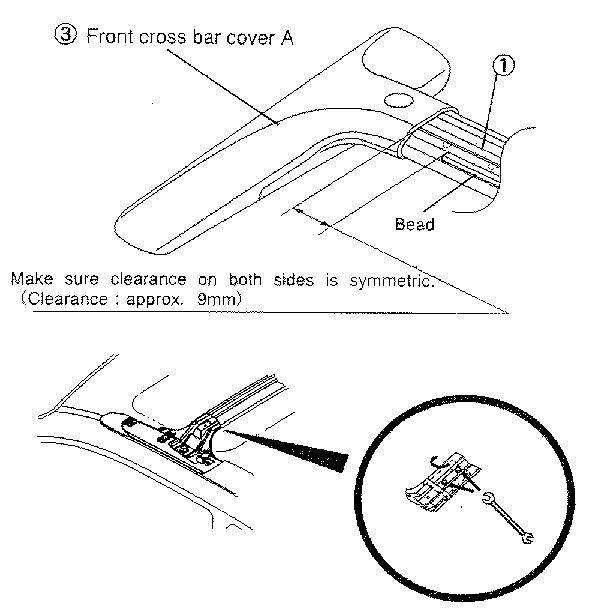
NOTE: This step requires two-people. Take care not to scratch the vehicle.
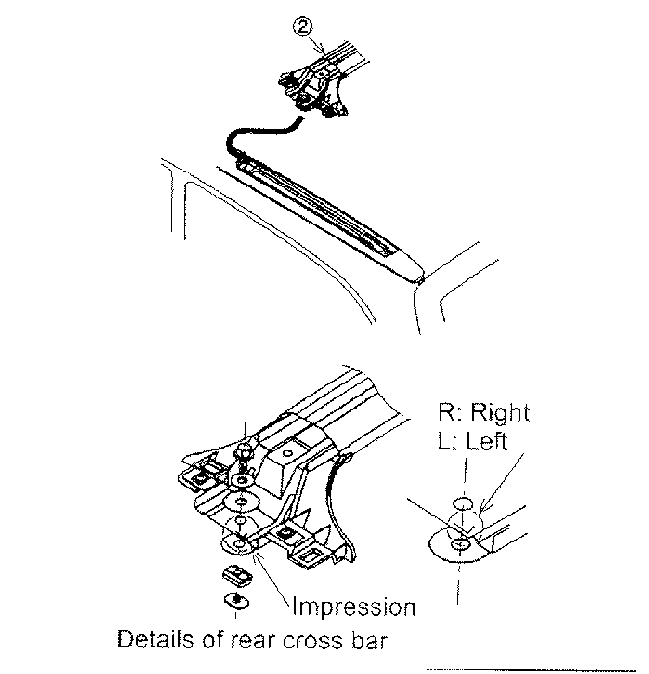
WARNING: Take extra time to double check that the roof rack is secure - pull on the rack at each corner to check it . If the rack is not secured, the side rails or cargo can fly off the vehicle and cause an accident.
CAUTION: Make sure rail covers are properly installed to prevent them from coming loose while driving.
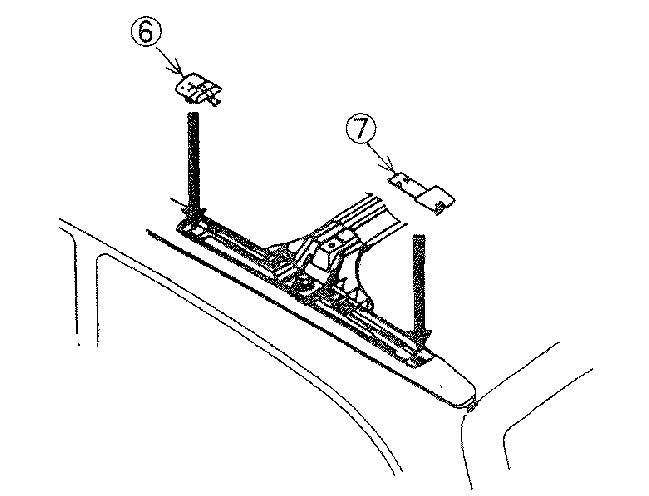
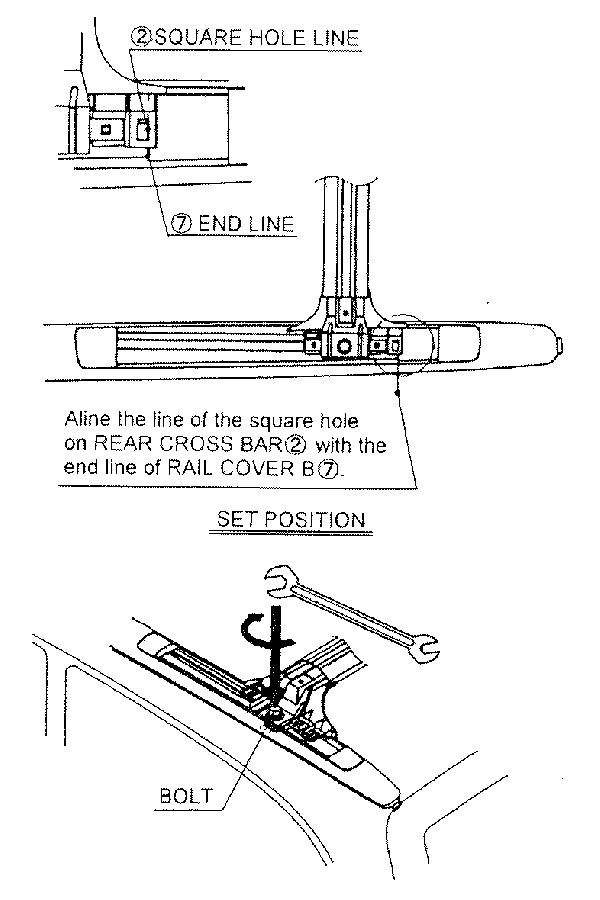
NOTE: If only one bolt is tightened and then the other, the cross bar will lean to one side distorting the rails and making the rack crooked, tighten the bolts evenly to prevent distortion.
WARNING: Take extra time to double check that the roof rack is secure - pull on the rack at each corner to check that it is secure. If the rack is not secured, its components the side rails or cargo can fly off the vehicle and cause an accident.
NOTE: The roof rack is optional equipment, installation and removal of the cross bars is not covered underwarranty.